Popsicle Stick Plant Markers for Pots and Seed Trays
Turn craft sticks into plant labels with a painted top and a hand-written name. Five simple styles, plus honest advice on how wood behaves in damp soil.

Tutorial at a glance
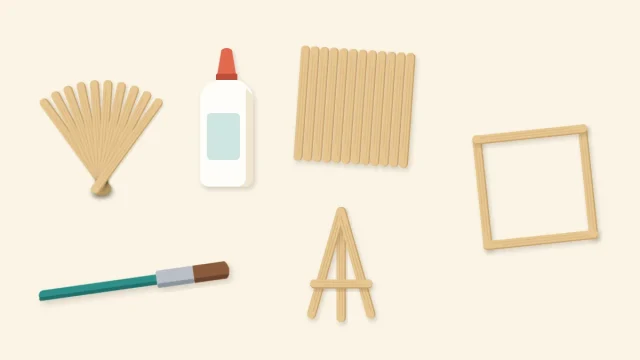
What you need
- About 12 standard or jumbo craft sticks
- Acrylic craft paint in a few colors
- Small flat brush
- Permanent pen or paint pen with a fine tip
- Fine sandpaper or an emery board
- Wax paper or baking parchment
- Optional clear water-based sealer, scrap card and white craft glue
Seedlings look alike for a long while, and a tray of unlabeled pots quickly becomes a guessing game. Popsicle stick plant markers solve that with almost no materials: a stick, a little paint and a pen. Each marker is a single flat piece, so this is a good first project for anyone new to craft sticks and an easy one to share with children.
Below are the basic method, five styles and a note on how wooden markers fare in damp soil.
What You Need
- About 12 standard or jumbo craft sticks, enough for a tray of pots plus spares
- Acrylic craft paint in a few colors
- A small flat brush
- A permanent pen or paint pen with a fine tip
- Fine sandpaper or an emery board
- Wax paper or baking parchment to work on
- Optional: clear water-based sealer, scrap card and white craft glue
Use new craft sticks, not washed food sticks, since new ones are clean, flat and all the same size. Standard sticks, about 4.5 in (11.4 cm) long, suit small pots and seed trays. Jumbo sticks, about 6 in (15 cm) long and twice as wide, give more room to write and stand taller in larger pots.
Paint, Label and Seal
Only the top of the stick needs decorating. The lower part goes into the soil, where paint would be hidden anyway.
- Paint the top third. Rub the stick lightly with fine sandpaper so the paint grips, then brush a thin, even coat of acrylic craft paint over the top third, front, back and edges. Painting both faces helps keep the stick from curling as it dries. Rest the painted end over the edge of the table or across a spare stick, and add a second thin coat once the first is dry to the touch if the wood still shows through.
- Write the name. When the paint is fully dry, write the plant name with a permanent pen or paint pen. Print in capital letters and start from the top so the word reads downward when the stick stands upright. If you write while the paint is still tacky, the pen tip drags and clogs.
- Brush on a clear coat. This step is optional. A coat of clear water-based sealer over the painted area, applied and left to dry as its label directs, helps the color and lettering stay crisp. Work in a ventilated room.
For even color without streaks, the guide to painting popsicle sticks smoothly covers brush choice and thin coats in more depth.

Five Marker Styles
All five start from the same method.
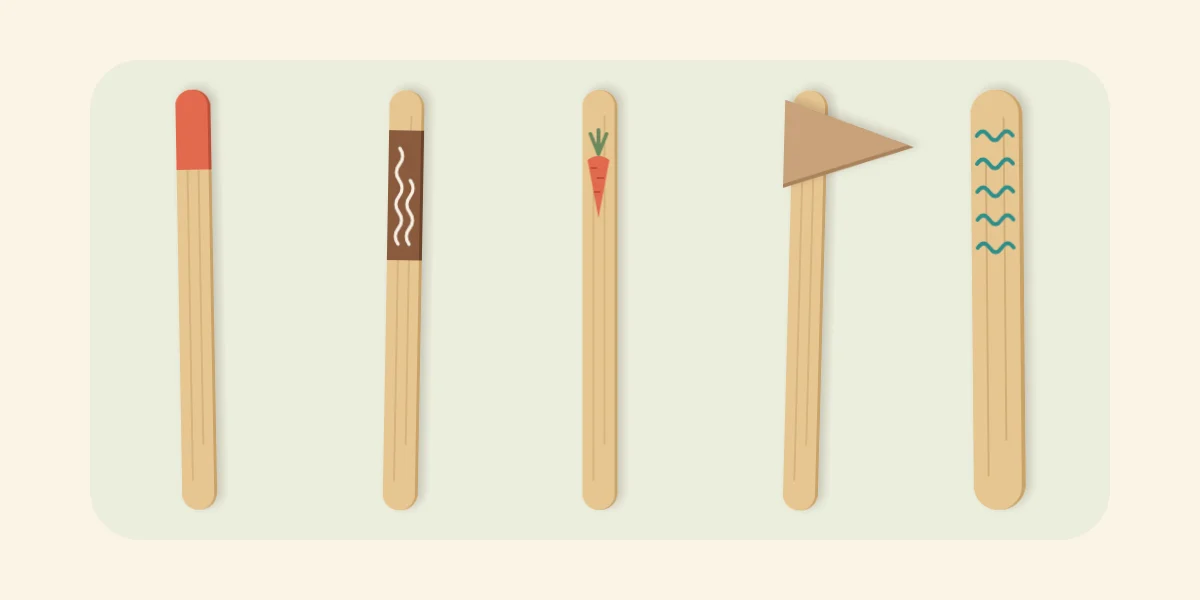
- Color-coded tip. Paint just the rounded tip, about 1 in (2.5 cm), in a solid color and leave the wood below it bare for the name. Assign a color to each group, such as one for herbs and another for flowers, and the tray can be read at a glance.
- Dark band. Paint a band of black, navy or deep green across the top third and write on it with a white or pale paint pen. Light lettering on a dark ground is the easiest to read from a distance.
- Picture icon. Paint a simple shape in place of a word: an orange carrot, a red tomato, a green leaf. Keep it to one or two flat colors. This style suits young children who cannot read the names yet.
- Card flag. Cut a small triangle from scrap card, write the name on it and glue it to the top of the stick with white craft glue. The flag gives a wider writing surface than the stick itself, though card suits indoor pots only.
- Patterned jumbo. On a jumbo stick, paint wavy lines, stripes or dots along the top third and write the name underneath. The extra width leaves room for both.
| Style | Stick size | Best for |
|---|---|---|
| Color-coded tip | Standard | Seed trays with many pots |
| Dark band | Standard or jumbo | Names that must be easy to read |
| Picture icon | Standard or jumbo | Making with children |
| Card flag | Standard | Long plant names, indoor pots |
| Patterned jumbo | Jumbo | Larger pots and gift plants |
Placing Markers in Pots and Trays
Push each marker in gently near the rim of the pot or beside the stem, not through the middle of the root ball. In a seed tray, set the marker at the back edge of each cell so it does not shade the seedling.
A stick should go in deep enough to stand on its own, usually about a third of its length.
Tip
Write the name in pencil on the bare lower end as well. If the painted lettering fades, the pencil note below the soil line often remains readable when you pull the marker out.
How Long Wooden Markers Last
Bare wood that sits in damp soil darkens, softens and can grow surface mildew over a growing season. Paint and sealer protect only the part above the soil, and nothing in this method should be taken as a promise that the markers will stand up to rain or constant watering. Treat them as seasonal: make a few spares at the start, replace any that soften, and compost or discard the old ones at the end of the season.
Indoors, on houseplants that are watered lightly, markers generally stay tidy for longer. They pair well with a decorative holder such as the popsicle stick planter box, where the pot lifts out for watering.
Watch out
Paint, pens and sealer are for the top of the stick only. Keep the finished end above the soil so that only bare wood goes into the pot, and follow each product label for use and cleanup.
Common Problems
- The ink feathers into the wood. You wrote on bare wood with a wet pen. Write on a painted area, or switch to pencil for bare wood.
- The paint peels at the edges. The coat was too thick. Use two thin coats and sand lightly first.
- The stick snaps when pushed in. The soil is dry and compacted. Water first, or open a slot with a pencil before inserting the marker.
- The name is too long to fit. Use a jumbo stick, a card flag, or write along the length in smaller capitals.
Next Steps
Once a set of markers is done, the same painting and lettering skills carry over to flat projects such as coasters and frames. The overview of popsicle stick crafts for beginners lists the sticks, glue and first builds to try after this one.
Frequently asked questions
What pen works best on popsicle stick plant markers?
A permanent pen or a paint pen with a fine tip gives the clearest lettering, especially over a painted area that has dried fully. On bare wood, ink can feather along the grain, so pencil is a better choice there. Pale paint pen on a dark painted band is the easiest combination to read.
Do popsicle stick plant markers last outdoors?
Treat them as seasonal labels. Bare wood in damp soil darkens and softens over a growing season, and paint or sealer on the top does not change what happens below the soil line. Make a few spares and replace any marker that goes soft.
Where should I push the marker into the pot?
Place it near the rim or beside the stem, not through the center of the root ball. Push gently and stop if you feel resistance, then try a spot slightly farther out. About a third of the stick in the soil is usually enough for it to stand upright.