Popsicle Stick Snowflake Ornaments for Winter
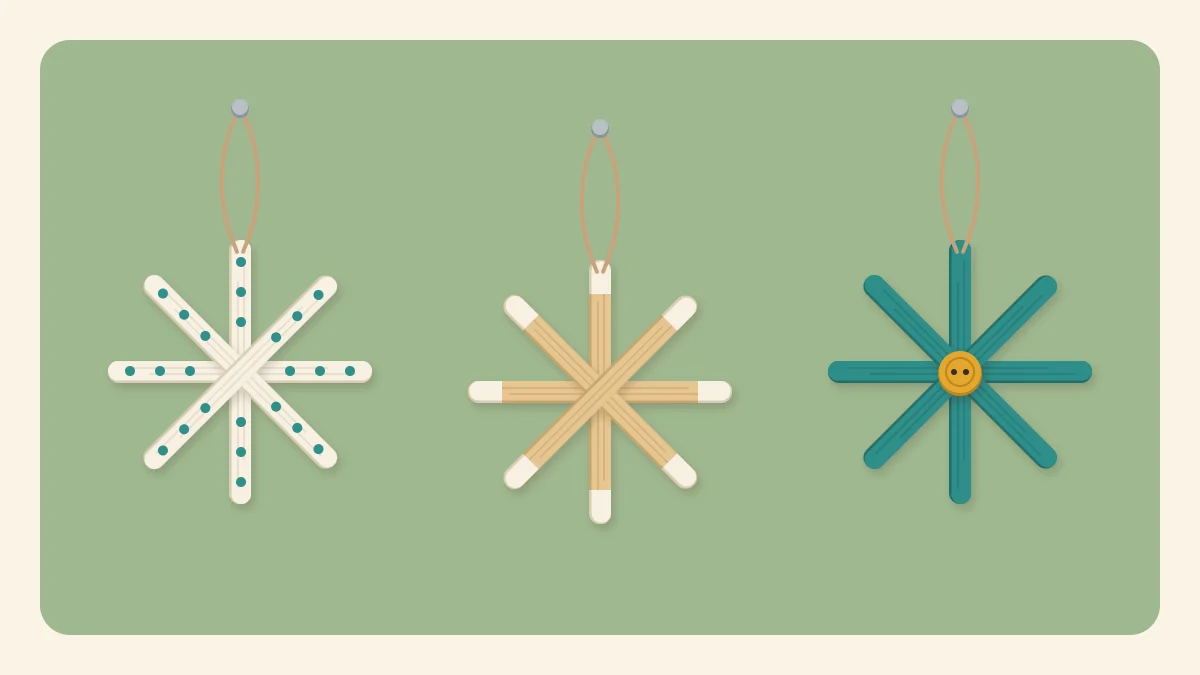
Cross four craft sticks into an eight-point snowflake, add small V details from mini sticks and finish it three ways. A six-point version uses three sticks.
Tutorial at a glance
What you need
- 4 standard craft sticks per snowflake
- 4 mini craft sticks per snowflake for the V details
- White craft glue or tacky glue
- Acrylic craft paint and a small brush
- Twine or strong thread for the loop
- Sturdy scissors, warm tap water and sandpaper
- Wax paper and a heavy book
- Optional: a flat button, a paint pen, craft glitter
Four sticks and a dab of glue are enough for popsicle stick snowflake ornaments. Two sticks cross as a plus sign, two more cross on the diagonal, and the result is an eight-point snowflake about 4.5 in (11.4 cm) across, ready for paint and a hanging loop.
Small V shapes cut from mini sticks turn the plain star into something that reads as a snowflake, and three simple finishes give a set that looks varied without needing different skills. Use new craft sticks, which is how popsicle sticks are sold in craft packs.
What You Need
For one eight-point snowflake:
- 4 standard craft sticks
- 4 mini craft sticks, cut in half for the V details
- White craft glue or tacky glue
- Acrylic craft paint in white, off-white or teal, and a small brush
- Twine or strong thread, about 8 in (20 cm)
- Sturdy scissors, warm tap water and sandpaper for the mini sticks
- Wax paper and a heavy book
- Optional: a flat button, a paint pen, craft glitter
Pick straight sticks. A bowed stick lifts the arms off the table and leaves the center joint with very little contact.
Versions and Stick Counts
| Version | Sticks | Look |
|---|---|---|
| Eight-point with V details | 4 standard, 4 mini | Full, detailed snowflake |
| Eight-point, plain | 4 standard | Simple star shape |
| Six-point | 3 standard | Lighter, more open |
Multiply by the number of ornaments you plan to make and add a few spare sticks for any that turn out bowed.
Building the Snowflake
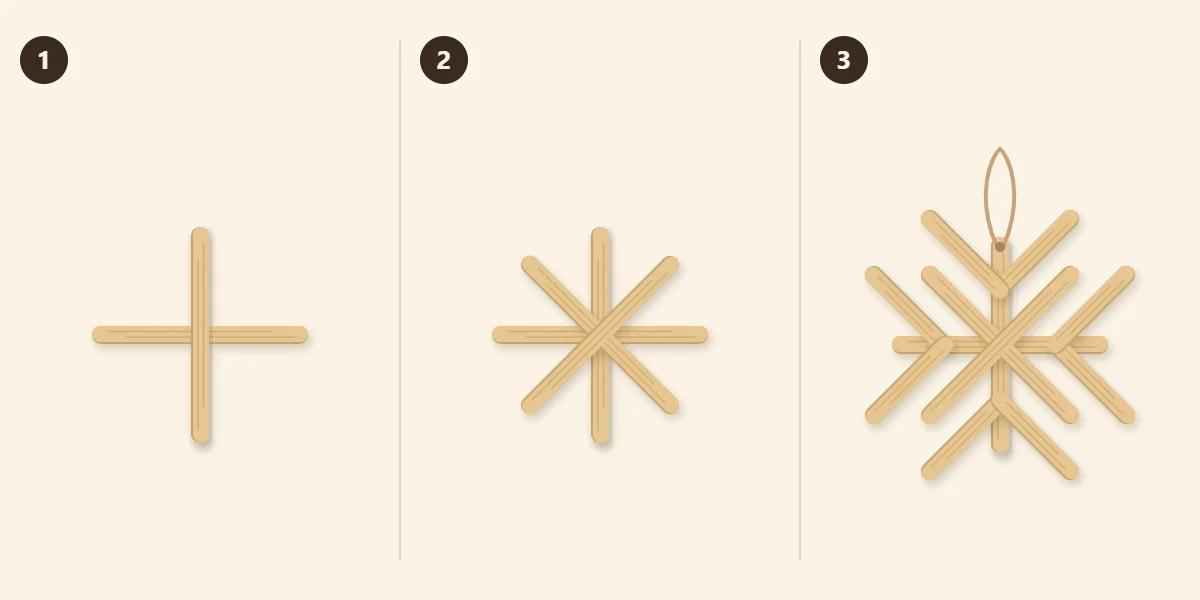
- Cross two sticks as a plus sign. On wax paper, glue one stick across the middle of another at a right angle. Find the middle by balancing the stick on a finger or by measuring, and mark it lightly in pencil.
- Add two more sticks on the diagonal. Glue the third stick on top so it splits the angle between two arms of the plus, then glue the fourth across it the other way. The eight arms should be evenly spaced, like the points of a compass. Lay wax paper over the center, rest the book on it and leave it until the glue has set.
- Add the V details and the loop. Cut four softened mini sticks in half and sand the cut ends, which gives eight short pieces. On four of the arms, every other one around the snowflake, glue two short pieces in a V near the tip, with the point of the V toward the center. Fold the twine into a loop, knot the ends and glue the knot to the back of the top arm.
The center is the only joint holding the four main sticks, so it needs glue on every layer and firm pressure while it sets. Because four sticks are stacked there, the arms sit at slightly different heights. That is normal, and it is why the weight goes over the center and not on the tips.
Wear eye protection when cutting the mini sticks, and have an adult do the cutting when children are helping. If you are unsure which adhesive suits the center joint and which suits the button and loop, the comparison of white glue, tacky glue and wood glue sets out the differences.
Tip
Draw two crossed lines and two diagonals on scrap paper and slide it under the wax paper. The lines show through and give every snowflake in the set the same even spacing.
The Six-Point Version
Real snow crystals have six points, and three sticks make that shape. Glue one stick across the middle of another at a slant, then glue the third on top so all six arms are evenly spaced. A quick check is to look at the gaps between neighboring tips, which should all match. Weight the center as before. With one layer fewer, the six-point version lies flatter and is the easier one for a first try.
Three Ways to Decorate
Painting after assembly is fine for these ornaments, since every face is easy to reach. Use thin coats so the arms stay straight, and paint the back once the front is dry to the touch. The guide to painting popsicle sticks smoothly covers brushes and coats in more detail.
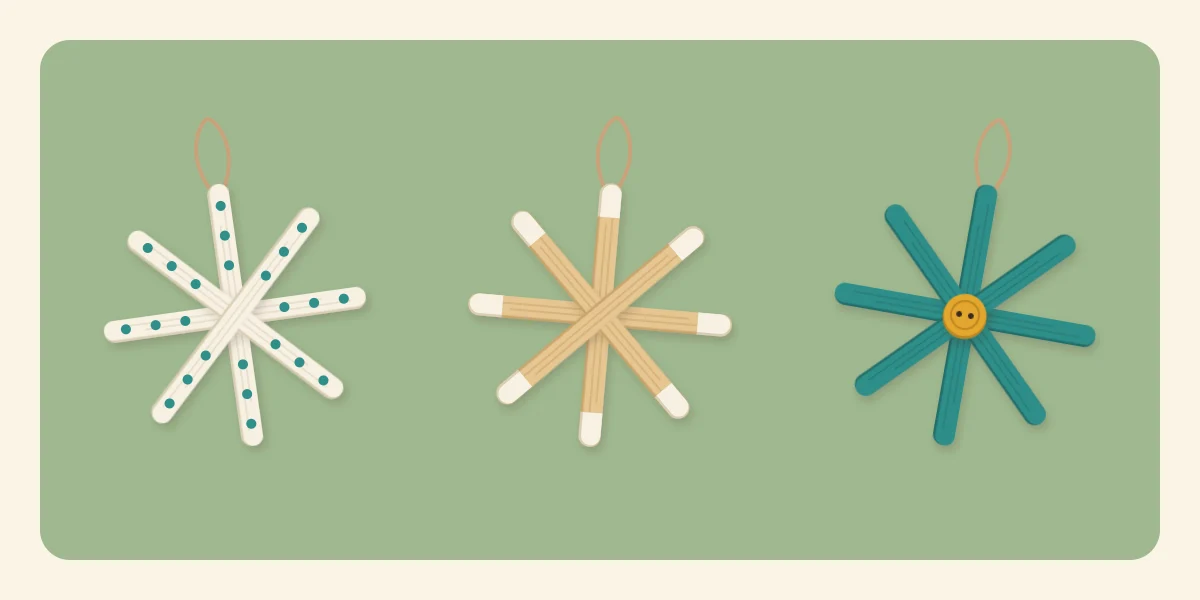
- Off-white with teal dots. Paint the whole snowflake off-white. When it is dry, add a row of teal dots along each arm with the handle end of a brush dipped in paint.
- Natural wood with white tips. Leave the wood bare and paint only the tip of every arm white. A strip of paper wrapped around the arm gives a straight edge to paint up to.
- Teal with a button center. Paint the snowflake teal and glue a flat mustard-colored button over the center joint, which also hides the stack of stick edges.
For sparkle, sprinkle craft glitter onto the paint while it is still wet and tap off the loose grains over a sheet of paper once it has dried.
Common Problems
- The arms are unevenly spaced. The diagonal sticks slid while the glue was wet. Use the paper guide under the wax paper and check again before adding the weight.
- The snowflake comes apart at the center. One layer missed its glue, or the center was not pressed. Reglue and weight it.
- A V piece falls off. It touches the arm on a very small area. Sand the contact point flat and use tacky glue.
- The ornament hangs crooked. The loop is glued off center. Attach it to the middle of one arm tip.
Hanging and Storing
A stick snowflake is light enough to hang from a tree branch, a window hook or a length of twine. Several in a row also work strung alongside a popsicle stick star garland.
Watch out
These are wood, paint and glue. Hang them well away from candles, heaters, fireplaces and any string-light bulbs that get warm, and keep buttons and glitter away from young children and pets.
To store the ornaments, lay them flat in a shallow box with a sheet of card between each one, so the V details and tips are not bent or snapped by the ones above.
Frequently asked questions
How many popsicle sticks does a snowflake ornament need?
An eight-point snowflake uses four standard craft sticks: two crossed as a plus sign and two crossed on the diagonal. Adding V details near four of the tips takes four mini sticks cut in half. A six-point snowflake uses three standard sticks.
Should the snowflake be painted before or after gluing?
Either works, because every face of a flat snowflake is easy to reach with a brush. Painting after assembly is quicker and covers the center joint. Use thin coats and paint both sides so the arms stay straight.
Where is it safe to hang popsicle stick ornaments?
Hang them from a branch, a window hook or a length of twine, well away from candles, heaters, fireplaces and light bulbs that get warm. They are made of wood, paint and glue. Keep small decorations such as buttons and glitter away from young children and pets.
