Mini Popsicle Stick Easel: A Tiny Stand for Cards and Photos
A five-stick A-frame easel for place cards, small photos and mini canvases, with a doubled ledge, a leaning back leg and sizes for mini, standard and jumbo sticks.

Tutorial at a glance
What you need
- 5 standard craft sticks
- Tacky glue or white craft glue
- Clothespins
- Pencil and ruler
- Wax paper or baking parchment
- Fine sandpaper or an emery board
- Thin twine (optional)
- Acrylic craft paint or stain (optional)
Five craft sticks and a few dots of glue are enough for a mini popsicle stick easel that stands on a shelf and holds a place card, a small photo or a tiny painting. The shape is a simple A-frame: two front legs, a ledge for the card to sit on, and a back leg that props it all up.
The easel is meant for small, light objects only. The sizes below are suggestions, since craft sticks (the name popsicle sticks are sold under in craft packs) vary a little between packs.
What You Need
- 5 standard craft sticks, each about 4.5 in (11.4 cm) long
- Tacky glue or white craft glue
- 2 or 3 clothespins
- Pencil and ruler
- Wax paper or baking parchment
- Fine sandpaper or an emery board
- Thin twine, about 4 in (10 cm), optional
- Acrylic craft paint or stain, optional
Use new craft sticks and pick the five straightest in the pack. A warped leg makes the easel lean. Tacky glue is the easiest choice here because it grabs quickly; the comparison of white glue, wood glue and tacky glue explains when each one is worth using.
Sizing the V for Your Card
The two front legs meet at the top and spread apart toward the bottom. For standard sticks, set the feet about 2.5 in (6.4 cm) apart, measured between the outer edges. A narrower V looks elegant but tips sideways easily. A wider one makes the easel shorter and leaves less of each leg touching the ledge.
The ledge is a whole stick, so it is about 4.5 in (11.4 cm) wide and extends past the legs on both sides. A card can be a little wider than the ledge, but anything much wider or taller than the easel itself will pull it over. Draw the V on a piece of paper first, lay the sticks on the drawing and stand your card against them to check the proportions.
Build the A-Frame, Ledge and Back Leg
Slide your drawing under a sheet of wax paper and build directly on top of it.
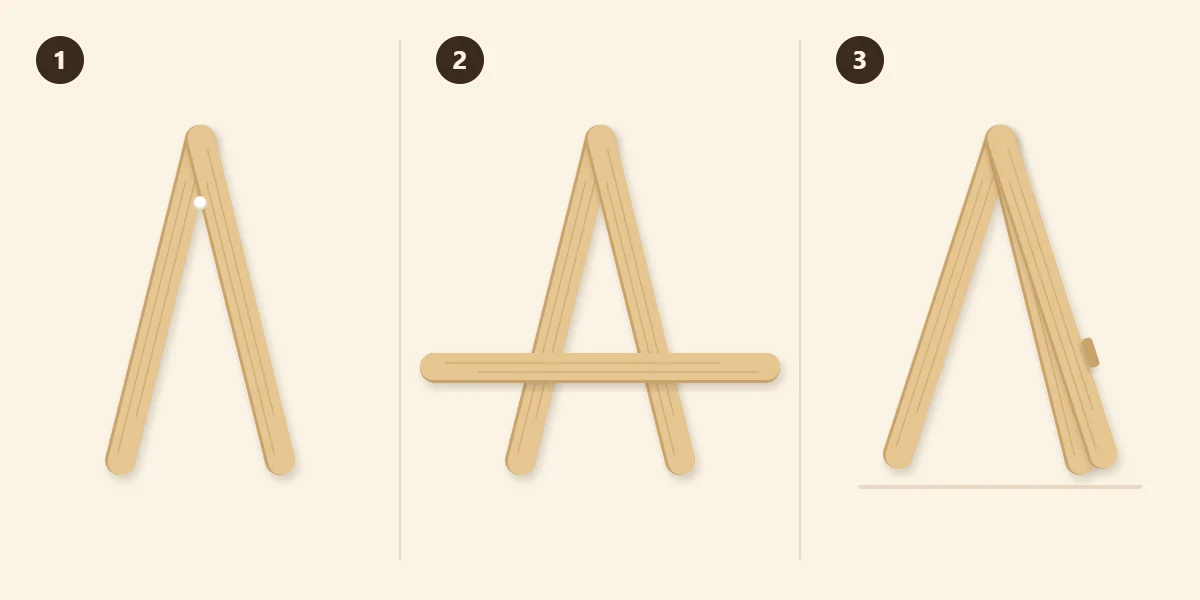
- Glue the V. Lay two sticks on the guide lines so their top ends overlap, one on top of the other, by about 1/2 in (1.3 cm). Put a dot of glue between the overlapped ends and clamp with a clothespin. The legs now form a narrow inverted V. Check the feet are still on the lines before the glue grabs.
- Add the ledge. Mark both legs about 1.5 in (3.8 cm) up from the feet, which is the lower third. Glue a stick across the legs at the marks, level with the table edge of your drawing. Then glue another stick flat on the face of the first, raised by about 1/8 in (3 mm). The raised stick forms a lip, and the narrow channel behind it holds the bottom edge of a card.
- Add the back leg. Once the front has set, turn it face down. Put a generous dot of tacky glue on the back of the overlapped tops and press the end of the last stick into it. Rest the lower end of this stick on a stack of spare sticks about 1 in (2.5 cm) high, so that it sets at an angle instead of lying flat. Leave it until the glue has fully set.
Stand the easel up. The back leg should touch down about 2 in (5 cm) behind the front feet. If the top joint feels weak, lay the easel face down again and add more glue around the joint so it forms a small fillet on both sides of the back leg.
The Optional Twine Tie
On a smooth surface the back leg can slide backward until the easel lies down. A short tie prevents that. Knot one end of the twine around the back leg, about level with the ledge, and fix the knot with a dot of glue. Stand the easel at the angle you want, then glue the other end of the twine to the back of the ledge at its center. The twine limits how far the legs can spread.
Tip
For a mini canvas or thick card, glue a spare strip of stick between the two ledge sticks before adding the lip. The extra layer widens the channel.
Scaling the Easel With Stick Size
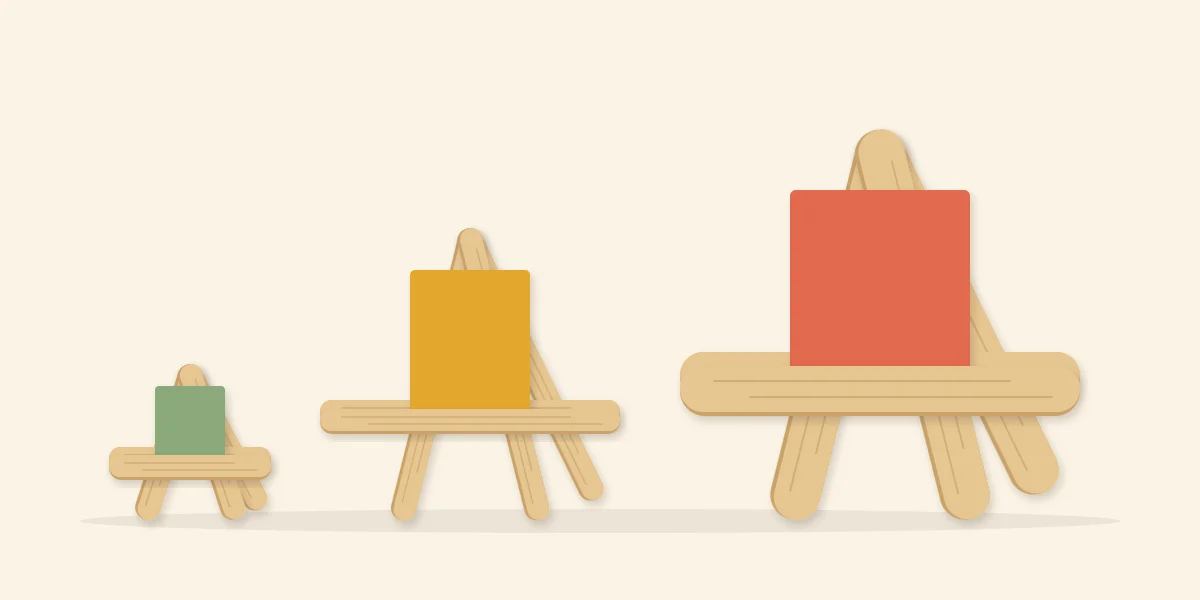
The same five-stick method works with any size of craft stick. Only the measurements change: keep the feet a little more than half a stick length apart and the ledge in the lower third.
| Stick size | Easel height | Suits |
|---|---|---|
| Mini, about 2.5 in (6.4 cm) | About 2.25 in (5.7 cm) | Place cards, gift tags |
| Standard, about 4.5 in (11.4 cm) | About 4.25 in (10.8 cm) | Small photos, note cards |
| Jumbo, about 6 in (15 cm) | About 5.75 in (14.6 cm) | Mini canvases, postcards |
Each easel stands slightly shorter than its sticks because the legs lean. Mini sticks are fiddly to clamp, so hold the top joint with your fingers until the tacky glue grabs. Jumbo sticks are twice as wide as standard ones, which gives bigger glue joints and a deeper ledge.
Common Problems
- The easel leans to one side. The legs are uneven or the V was glued off center. Sand the longer foot a little at a time until the easel stands straight.
- The card slides off. The lip is too low. Add a third ledge stick, raised slightly higher than the last.
- The back leg snaps off. That joint has the smallest glue area in the project. Scrape it clean, glue it again with a larger fillet and add the twine tie.
- The easel tips forward. The card is too large or the back leg too upright. Use a smaller card or set the back leg at a wider angle.
Finishing and Ideas for Using It
Paint or stain the easel after the glue has set, using thin coats so the joints are not soaked.
Several easels in a row make table markers for a party, each holding a name or a menu card. For framed prints, pair one with a simple popsicle stick picture frame, keeping the frame small enough for the easel to carry. To show several photos at once on a wall instead, a hanging ladder display with mini clips uses the same sticks. Keep the easel away from candles and heat, and keep mini sticks away from young children and pets.
Frequently asked questions
How many popsicle sticks does a mini easel need?
This design uses five sticks of the same size: two front legs, two for the doubled ledge and one back leg. Have a few spares on hand so you can choose the straightest ones and use the rest as props while the back leg sets.
What can a craft stick easel hold?
It is for small, light objects such as place cards, gift tags, small photos, note cards and mini canvases. Anything much wider or taller than the easel itself tends to tip it, so match the stick size to the item.
How do you stop the back leg from sliding out?
Tie a short piece of twine between the back leg and the center of the ledge and fix both ends with glue. The twine sets a limit on how far the legs can spread, which also takes strain off the small glue joint at the top.