Popsicle Stick Pencil Holder: A Simple Desk Cup Built Around a Cardboard Tube
Glue craft sticks upright around a sturdy cardboard tube to make a round desk cup. Includes a paper-strip method for the stick count and a masking tape shortcut.

Tutorial at a glance
What you need
- About 25 standard craft sticks for a 3 in (7.5 cm) tube, plus spares
- Sturdy cardboard tube about 3 in (7.5 cm) across
- Stiff card for the base circle
- White craft glue or tacky glue
- Masking tape and a scrap paper strip
- Two or three rubber bands
- Pencil, ruler and scissors
- Acrylic craft paint and a brush (optional)
- Kraft twine
A popsicle stick pencil holder is one of the most forgiving first projects, because a cardboard tube does the structural work and the sticks simply dress it. You glue standard craft sticks upright around the tube, stand it on a card circle, and finish with paint and a band of twine.
The only part that takes a little thought is the stick count. Tubes vary in width, so the number of sticks varies too. A paper strip and a ruler settle it before any glue comes out, and a simple masking tape trick makes the wrapping neat even if your spacing is not perfect.
What You Need
- About 25 standard craft sticks for a tube about 3 in (7.5 cm) across, plus a few spares
- A sturdy cardboard tube about 3 in (7.5 cm) across
- Stiff card for the base, such as the back of a notepad
- White craft glue or tacky glue
- Masking tape and a strip of scrap paper
- Two or three rubber bands
- Pencil, ruler and scissors
- Acrylic craft paint and a brush (optional)
- Kraft twine for the band
- Wax paper or baking parchment to work on
Prepare the Tube and Base
The tube should end up shorter than a stick, so the stick tips rise above the card rim and hide it. A standard stick is about 4.5 in (11.4 cm) long, so a tube about 4 in (10 cm) tall works well. If yours is taller, draw a line around it at that height and trim it with scissors; an adult should do this when making with children, because thick card takes some force.
Stand the tube on the stiff card, trace around it with a pencil, and cut out the circle. Run a line of glue around the bottom rim of the tube, press it onto the circle and leave it standing on wax paper until the glue has set.
Work Out the Stick Count
Wrap a strip of scrap paper once around the tube and mark where it meets itself. Lay the strip flat: the distance from the end to the mark is the distance around the tube. Now lay sticks side by side along the strip, edges touching, until they reach the mark. That number is your count.
A tube about 3 in (7.5 cm) across is roughly 9.4 in (24 cm) around, and standard sticks are about 3/8 in (1 cm) wide, so it takes roughly 25. The sticks will rarely fit to the exact stick. If the last one is slightly too wide for the gap, leave it out and spread the others with hairline spaces between them; over two dozen sticks, the extra space disappears.
| Tube width | Distance around | Approximate sticks |
|---|---|---|
| 2 in (5 cm) | 6.3 in (16 cm) | 17 |
| 2.5 in (6.4 cm) | 7.9 in (20 cm) | 21 |
| 3 in (7.5 cm) | 9.4 in (24 cm) | 25 |
Paint the Sticks First
If you want color, paint before gluing. Loose sticks are far easier to coat evenly than a finished cylinder, and the edges come out clean. Paint only the outer face and edges, leaving the back bare, because glue grips bare wood best. The guide to painting craft sticks in thin coats explains how to keep them from warping as they dry.
Cover the Tube
- Glue a section. With the tube standing on its card base, brush or spread a thin, even layer of glue over a strip of the tube about four sticks wide, from bottom rim to top.
- Stand the sticks around it. Press each stick on vertically with its lower end resting on the table, so all the bottoms line up and cover the edge of the base. Work around the tube a section at a time. Once the front half is covered, slip a rubber band around the middle to keep those sticks from sliding while you continue.
- Close the circle and tie the band. Finish the back half, adjust the spacing by eye so the last gap is shared out, and add a second rubber band near the top. When the glue has set, remove the rubber bands, wrap kraft twine around the middle several times and knot it at the back.
Each stick touches the curved tube along a narrow line, so the joint relies on a continuous layer of glue rather than dots. For more on why contact area matters, see the guide to joining and reinforcing craft stick structures.

The Tape-Mat Shortcut
Placing sticks one at a time on a curved, gluey surface can get messy. The tape mat gives the same result with more control. Lay a strip of masking tape sticky side up on the table and press sticks onto it side by side, bottoms lined up against a ruler, with their good faces down on the tape. About ten sticks per strip is easy to handle; make as many mats as your count requires, with a shorter one to finish.
Spread glue on the tube, then pick up a mat by the tape and wrap it around, bare wood against the glue. The tape acts as a hinge, so the sticks stay evenly spaced and upright as they curve. Butt the next mat against the first, secure everything with rubber bands, and peel the tape away gently once the glue has set.

Common Problems
- Sticks lean or spiral. The first stick was not vertical and the rest followed it. Check the first one against the corner of a card held upright, and check again every five or six sticks.
- Sticks slide down or pop off. There was too little glue, or the layer skinned over before the sticks went on. Glue only a small section at a time.
Finishing and Variations
Leave the wood natural for a plain desk cup, paint the top rim of sticks in a single color, or dip-paint the bottom third of each stick before assembly for a banded look. The cup is meant for small, light objects such as pencils, pens and brushes.
Watch out
The holder is card and wood held with craft glue, so keep it dry and never use it as a vase or a brush-rinsing pot.
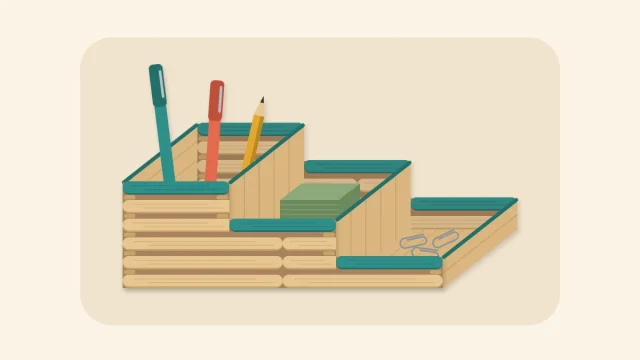
If one cup is not enough, the same tube technique scales to different widths, and a flat-sided desk organizer with three compartments makes a natural companion piece for sorting clips, notes and longer tools.
Frequently asked questions
How many popsicle sticks do I need for a pencil holder?
It depends on the tube. Wrap a paper strip around the tube, mark where it meets, lay it flat and line sticks along it side by side. A tube about 3 in (7.5 cm) across takes roughly 25 standard sticks, but stick widths vary between packs, so check with your own strip.
What if the sticks do not fit exactly around the tube?
They rarely do. If the last stick is too wide for the remaining gap, leave it out and spread the others with very small spaces between them. Shared across two dozen sticks, the extra space is hard to notice, and any slightly wider gap can sit at the back.
Should I paint the sticks before or after gluing them to the tube?
Before is easier. Loose sticks can be painted flat with clean edges, while a finished cylinder has narrow grooves that are awkward to reach. Leave the back of each stick bare so the glue has raw wood to grip.