How to Cut Popsicle Sticks Cleanly Without Splitting
Soften the stick in warm tap water, cut just outside the line with sturdy scissors, then sand back to the mark. Here is how to get square ends without cracks.
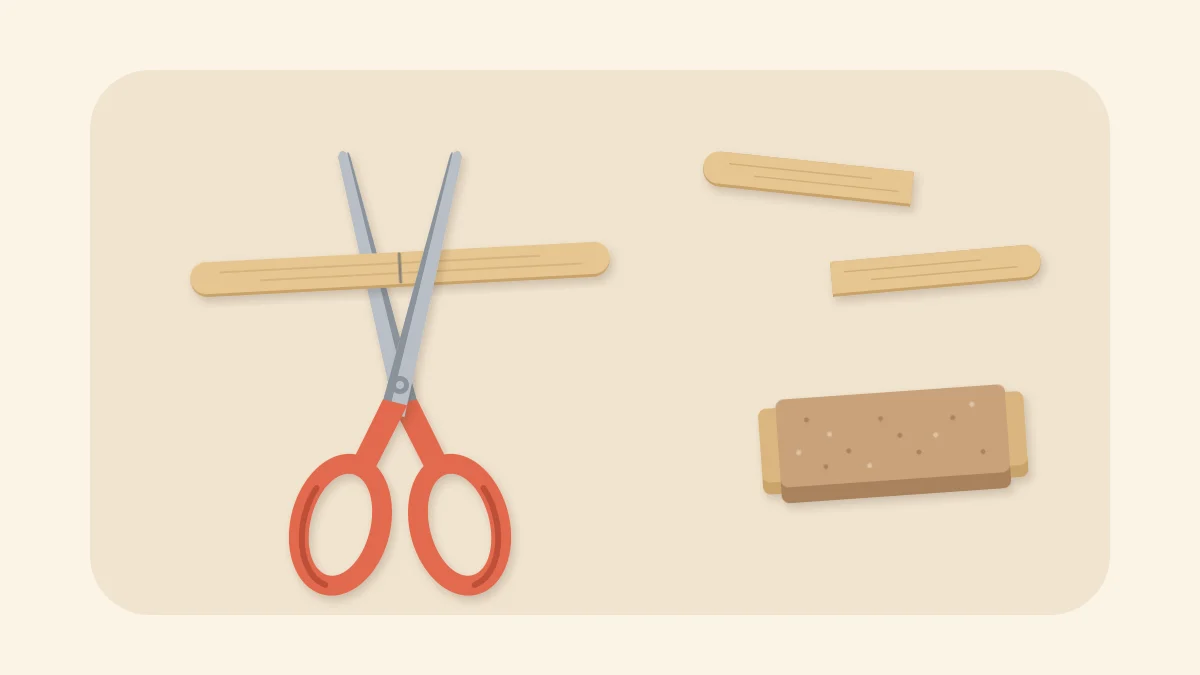
Tutorial at a glance
What you need
- New craft sticks, plus several spares for practice
- Pencil and ruler
- Shallow dish of warm tap water
- Sturdy household or craft scissors
- Eye protection
- Tray or large clear bag to catch offcuts
- Sandpaper or an emery board
Learning how to cut popsicle sticks cleanly comes down to three habits: soften the wood first, cut a little outside your line with sturdy scissors, and sand back to the mark. Skip any one of them and the stick tends to crack along its length instead of across it, which leaves a ragged end and a wasted piece.
The method below uses only household tools and works on standard, jumbo and mini craft sticks, which are the same thing as popsicle sticks sold in craft packs. Start with new craft sticks rather than washed food sticks.
Why Popsicle Sticks Split
A craft stick is a thin strip of wood whose grain runs from one rounded end to the other. The fibers are strong along that length and weakly bonded side to side. When scissors squeeze a dry stick, the wood resists being sheared across the fibers, and the pressure escapes the easy way: a crack that runs along the grain, often well past the place you meant to cut.
Slightly damp wood bends before it breaks, and that give lets the scissors pass through.
First Choice: Design Around Whole Sticks
The cleanest cut is the one you never make. Before marking anything, check whether the project can be sized to suit full sticks. A standard stick is about 4.5 in (11.4 cm) long, and twelve of them side by side are about as wide as one stick is long, so squares, frames and boxes can often be drawn to those dimensions. The guide to sketching a project and working out stick counts shows how to draw a design at full size so that most parts need no trimming.
For short parts, reach for mini sticks, which are about 2.5 in (6.4 cm) long and already have neat rounded ends. They make ready-made legs, rails and braces, and small builds such as a miniature chair and table set use them heavily for exactly that reason. Measure your own pack, because sizes vary a little between makers.
What You Need
- New craft sticks, plus several spares for practice cuts
- A pencil and a ruler
- A shallow dish of warm tap water
- Sturdy household or craft scissors
- Eye protection
- A tray or a large clear bag to catch offcuts
- Medium and fine sandpaper, or an emery board
- A cloth or paper towel
Mark, Cut and Sand
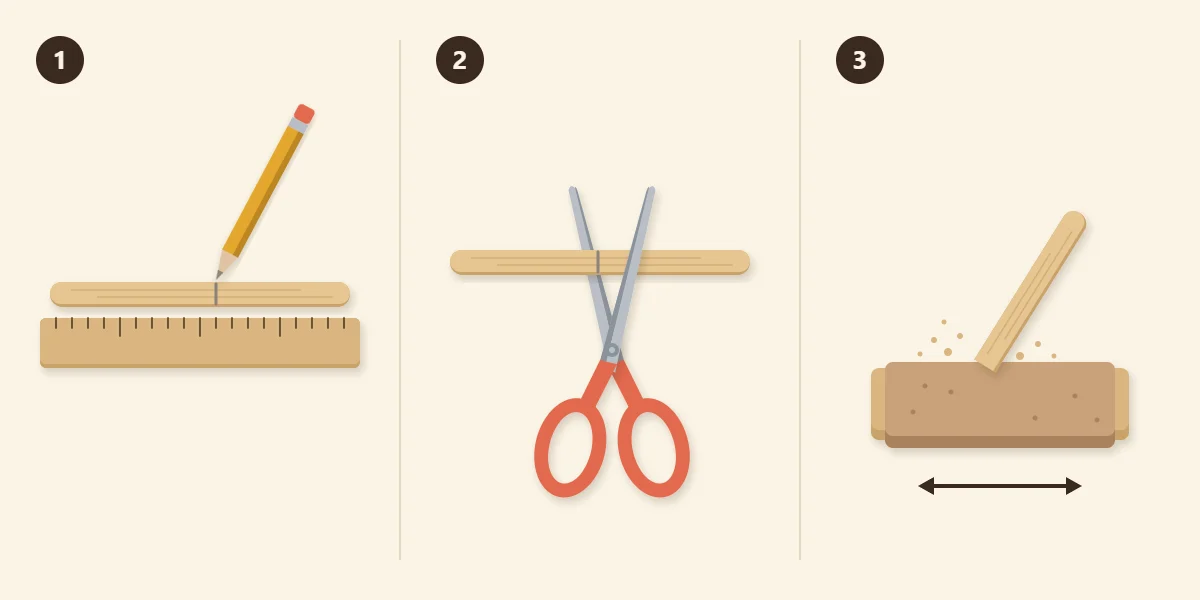
- Mark the cut. Lay the stick against a ruler and draw a pencil line straight across it at the length you need. For several matching parts, mark them all from the same ruler position so they agree with each other.
- Soften the stick. Rest the marked sticks in warm tap water until one flexes easily when you bend it gently between your fingers. Warm water from the tap is all it takes. Pat the surface with a cloth so the stick is damp, not dripping.
- Set up to catch the offcut. Put on eye protection. Hold the stick low over a tray, or put your hands and the stick inside a large clear bag, so the cut piece cannot fly across the room.
- Cut beside the mark. Open the scissors wide and seat the stick deep in the jaws, close to the pivot where the leverage is greatest. Place the cut a little outside the pencil line, on the waste side, and close the scissors in one firm, steady squeeze. Nibbling with the tips twists the wood and starts a crack.
- Sand to the line. Lay sandpaper flat on the table and rub the cut end on it, holding the stick upright, until the end is square and reaches the pencil mark. Finish with a few light strokes on the corners so no splinters remain.
- Dry flat. Let the damp pieces dry flat under a light weight, such as a book over wax paper, before gluing. Damp wood glued in place can warp as it dries.
Cutting outside the line matters because scissors crush the fibers slightly at the cut. The extra sliver gives you sound wood to sand back to, so the finished end is clean rather than bruised.
Matching the Method to the Cut
Different shapes need slightly different handling. Use this table as a starting point and test on a spare stick first.
| Need | Method | Finish |
|---|---|---|
| Short part | Use a mini stick | None needed |
| Straight cut across | Soften, cut outside line | Sand end square |
| Angled end | Soften, cut in one squeeze | Sand to the angle |
| Rounded end | Cut straight first | Round with emery board |
Craft nippers made for wooden craft sticks are another option. If you have a pair, follow the instructions that come with the tool, keep the same eye protection and offcut precautions, and still sand the ends afterward.
Split Cuts Versus Clean Cuts
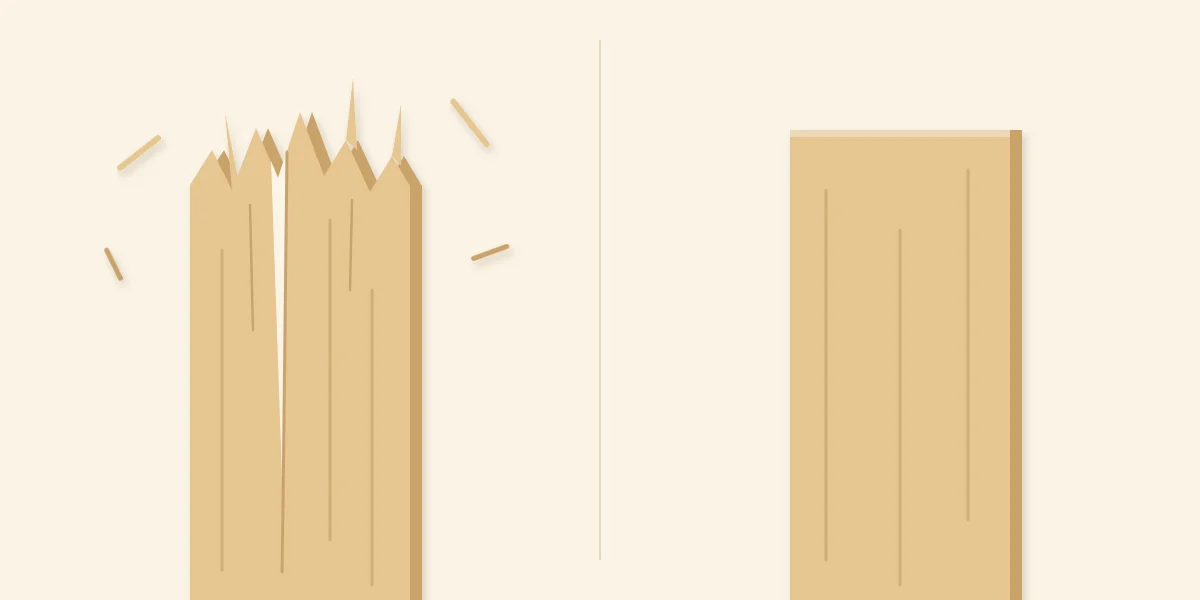
A split cut is easy to recognize. The end is ragged, splinters stand up from the surface, and a long crack runs along the stick, sometimes for half its length. A cracked part should not go into a project, because glue and paint will not close the crack.
A clean cut is square across, flat when you stand the stick on end, and smooth to the touch. If your cuts keep splitting, the usual causes are:
- The stick was too dry. Return it to the warm water until it flexes.
- The cut was made with the tips. Move the stick back toward the pivot of the scissors.
- The scissors were closed slowly or in stages. Use one firm squeeze.
- The scissors are too light. Small paper scissors flex and twist the wood. Use a sturdier pair.
- The stick already had a flaw. Sort out sticks with knots or hairline cracks and keep them for practice.
Splitting is one of several avoidable problems covered in the roundup of common craft stick mistakes and their fixes, along with warping and weak joints.
Safety When Cutting
Cutting is the one step in most stick projects that calls for real care. Wear eye protection every time, even for a single cut, and make sure anyone nearby is out of the path of a stray offcut. Keep the fingers of your holding hand well back from the scissors.
Watch out
When you are making a project with children, an adult does all the cutting. Prepare the cut parts ahead of time, sand every end smooth, and let children do the arranging, gluing and decorating.
Short cut pieces are small parts, so sweep them up and keep them away from young children and pets.
Frequently asked questions
Why do popsicle sticks split when I cut them?
The grain of a craft stick runs along its length, and the fibers separate from each other far more easily than they shear across. A dry stick squeezed by scissors cracks along that grain instead of cutting. Softening the stick in warm tap water and cutting in one firm squeeze near the pivot of the scissors keeps the break where you marked it.
Can I cut popsicle sticks with regular scissors?
Yes, as long as the scissors are sturdy. Light paper scissors flex and twist the wood, which starts a crack, so use a solid household or craft pair. Soften the stick first, wear eye protection, and hold the stick low over a tray or inside a clear bag so the offcut cannot fly.
Is cutting sticks necessary for every project?
Often you do not. Many projects can be sized to suit whole standard sticks, and mini sticks cover most short parts with their ends already rounded. Sketching the design at full size before you start shows which pieces, if any, really need trimming.