Popsicle Stick Joints: How to Join and Reinforce Craft Stick Structures
The four basic craft stick joints, why end-to-end joints fail, and how braces, gussets, doubled layers and log-cabin stacking stiffen a structure.
Tutorial at a glance
What you need
- About 20 standard craft sticks for practice joints
- White craft glue or wood glue
- Clothespins
- Thin card for gussets
- Scissors
- Wax paper or baking parchment
Popsicle stick joints come down to one idea: glue holds across an area, so the more two sticks overlap, the better they stay together. Every sturdy craft stick project, from a coaster to a model bridge, is built from four simple overlapping joints and a few ways of stiffening them.
Learn the four joints first, then the reinforcements.
Why Butt Joints Fail and Overlaps Work
A butt joint is two sticks glued end to end, or the end of one stick glued against the side of another. It looks tidy and it almost always breaks. A standard craft stick is only about 1/12 in (2 mm) thick and 3/8 in (1 cm) wide, so the end of a stick offers only a sliver of surface for the glue. The end grain also soaks up glue instead of bonding with it. The slightest bend levers the joint open.
Overlap the same two sticks by the width of a stick and the glued area becomes many times larger, and it sits on the smooth flat faces where glue bonds best. None of the joints below rely on stick ends or edges alone.
The Four Basic Joints
1. Edge-to-edge panel with cross sticks
Lay sticks side by side with their edges touching, then glue a cross stick across them at a right angle. The edges themselves are not what holds the panel together: the cross stick is. Each stick in the row is glued flat to the cross stick, and two cross sticks, one near each end, keep the panel from hinging. This is the joint behind coasters, box bases, roofs and walls.
2. Lap joint
To make a piece longer than one stick, put two sticks in a line and overlap their ends, gluing one on top of the other. An overlap of about 1 in (2.5 cm) is a sensible starting point; longer is stiffer. The piece has a small step where the sticks overlap, so plan which face will be hidden.
3. Overlapped corner
For a frame corner, lay the end of one stick across the end of the other so they form an L, with the corner itself two sticks thick. Four of these make a square frame with a front layer and a back layer.
4. Cross joint
Two sticks crossed like a plus sign and glued where they meet. On its own a cross joint can twist, but several of them in a grid or lattice lock each other in place.

Where Each Joint Belongs
| Joint | Where to use | How to reinforce |
|---|---|---|
| Panel with cross sticks | Bases, lids, walls, roofs | Two cross sticks, or a full crosswise layer |
| Lap joint | Pieces longer than one stick | Longer overlap, or a doubled layer |
| Overlapped corner | Frames and rectangles | Gusset or diagonal brace |
| Cross joint | Grids, lattices, snowflake shapes | More crossings, or a backing stick |
Diagonal Braces: Turning Rectangles into Triangles
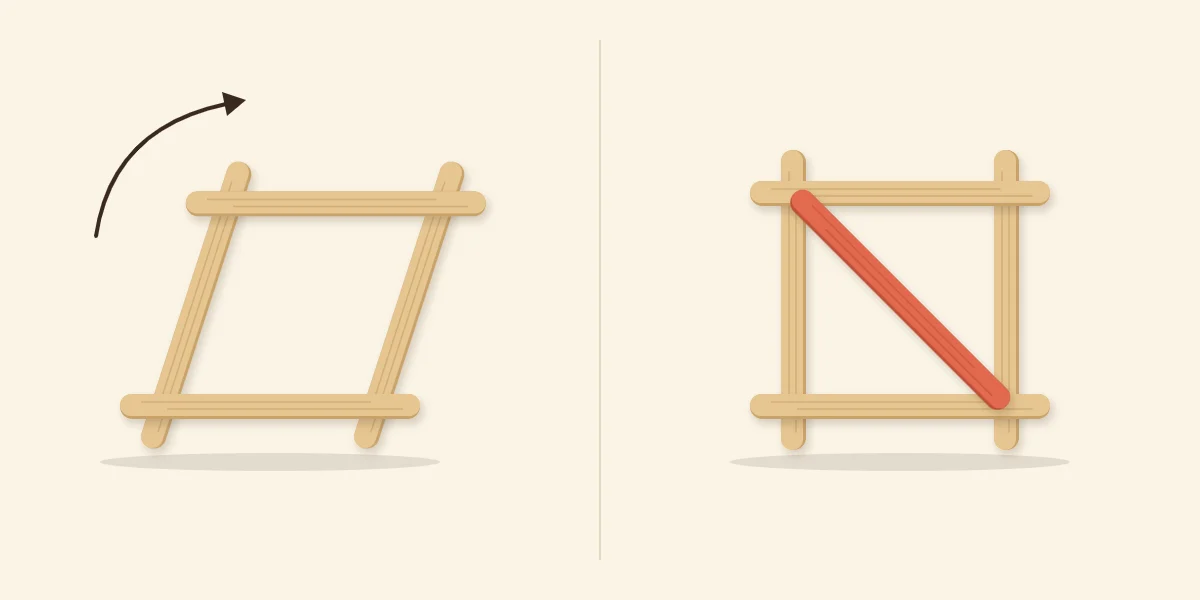
A square frame with four glued corners feels solid lying on the table. Stand it up and push one top corner sideways, and it leans into a slanted parallelogram. Nothing has broken; each corner has simply turned a little, like a hinge. A rectangle can change shape without any of its sides changing length.
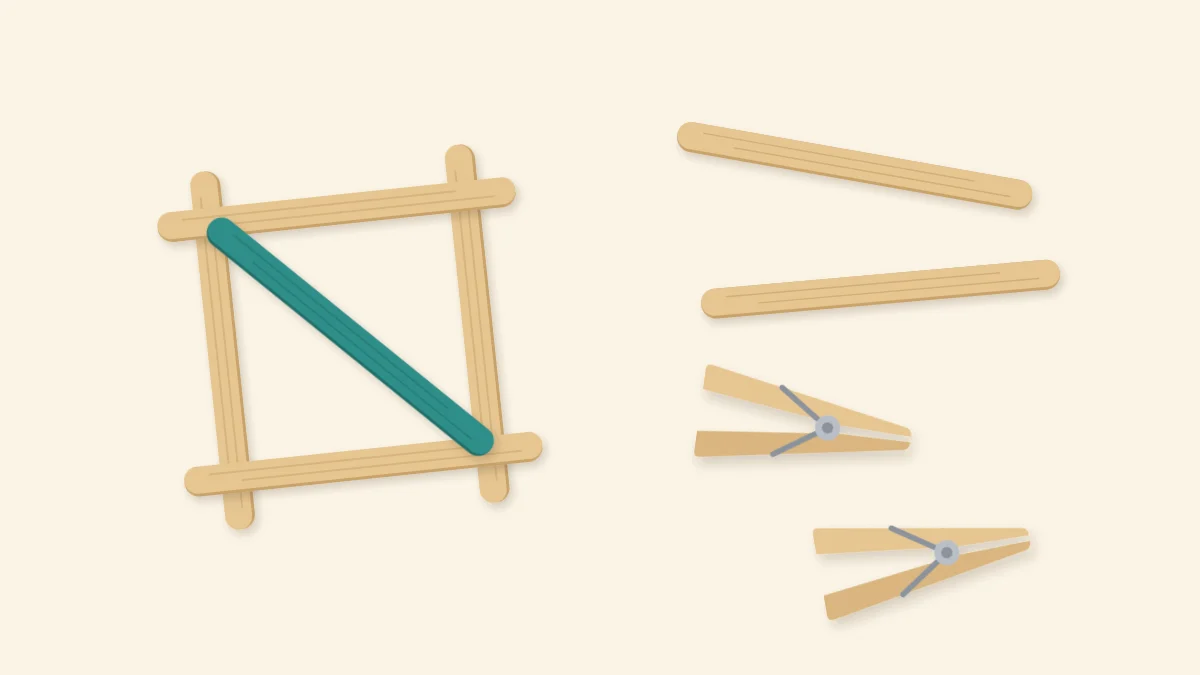
A triangle cannot. Glue one stick diagonally from corner to corner and the square becomes two triangles. For the frame to lean now, the diagonal brace would have to stretch or shorten, and a wooden stick does neither easily. One brace is enough to hold a square. This is the principle behind every truss, and you can see it applied panel by panel in the simple truss bridge model.
A standard stick is too short to reach corner to corner across a square of standard sticks. Use a jumbo stick, or run a shorter brace across one corner.
Gussets in the Corners
A gusset is a small triangle glued flat over a corner so that it bridges both sticks. It does the same job as a brace in a smaller space, and it suits places where a full diagonal would get in the way, such as a picture frame opening or the inside of a shelf.
Cut gussets from thin card, such as a cereal box, with scissors. Stick offcuts also work if you already have some. Glue the gusset on the back or inside face where it will not show, and press it down until the glue has set.
Tip
Check a corner against the corner of a sheet of paper before the glue sets. A gusset or brace locks in whatever angle the frame has at that moment, square or not.
Doubling Layers with Staggered Seams
For a long, stiff piece such as a beam or a rail, glue two layers of sticks face to face. The rule is to stagger the seams: where two sticks meet end to end in one layer, the middle of a stick should cover that spot in the other layer. Each seam is then backed by solid wood, in the same way bricks overlap in a wall.
If the seams line up in both layers, the beam will fold there. Dry fit the pieces first to see where every seam falls.
Log-Cabin Stacking for Walls
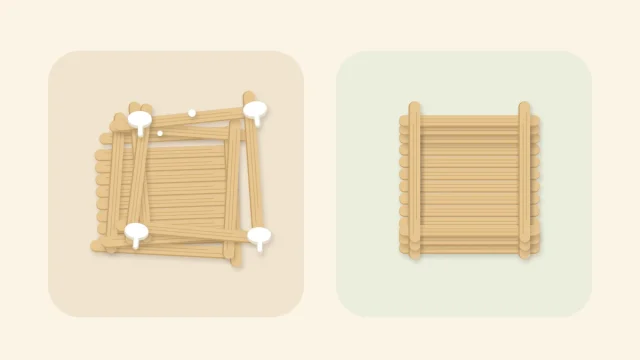
Log-cabin stacking builds walls without any edge gluing. Lay two sticks parallel on opposite sides of a base, then lay the next pair across their ends on the other two sides, and keep alternating. Every stick rests on the ends of the pair below, so each corner is a column of overlapped ends.
The walls have gaps between the sticks on each side, which gives a slatted look. The lidded box project uses this method from the base up.
Watch out
Reinforcing makes a model stiffer, but craft stick structures are still for display and for small, light objects. Do not rely on one to carry anything that matters.
Choosing Joints Before You Glue
Decide on the joints while the project is still a sketch, and mark where each overlap, brace or gusset will go. The guide to planning a project with sketches and stick counts shows how to draw this out at full size. Use wood glue for joints that keep a standing piece upright, and clamp each one with a clothespin until the glue has set.
Frequently asked questions
Why do popsicle sticks glued end to end break apart?
The end of a craft stick is tiny, so an end-to-end joint has almost no glued area, and the end grain soaks up glue instead of bonding. Overlap the ends in a lap joint instead. The glue then holds across the flat faces, which is a much larger area.
How do I stop a popsicle stick frame from wobbling?
Add a diagonal brace or corner gussets. A rectangle can lean into a parallelogram without any side changing length, but a triangle cannot change shape. One diagonal stick turns the frame into two triangles and holds it square.
What is a gusset in craft stick building?
A gusset is a small triangle of thin card or stick offcut glued flat over a corner so it bridges both sticks. It stiffens the corner the way a brace does but takes up less room. Glue it on the back or inside where it will not show.