Mini Popsicle Stick Shelf for Small Trinkets
Build a small free-standing two-tier shelf from craft sticks: two ladder-like side frames, two three-stick shelves and an X brace on the back that stops the wobble.

Tutorial at a glance
What you need
- About 10 standard craft sticks
- 4 mini craft sticks
- 2 jumbo craft sticks
- White craft glue or tacky glue
- Sturdy scissors and warm tap water
- Sandpaper or an emery board
- Pencil, ruler and a square piece of card
- Wax paper, clothespins and a heavy book
A mini popsicle stick shelf is a small free-standing unit with two tiers, sized for a desk corner or a windowsill. It is built from two ladder-like side frames, two shelf panels and an X-shaped brace across the back, and it holds very light trinkets: a thimble-sized pot, a tiny bottle, a few beads or buttons.
The finished shelf is about 4.75 in (12 cm) wide, 4.5 in (11.4 cm) tall and 1.5 in (3.8 cm) deep. Most of it is made from whole craft sticks, the name popsicle sticks are sold under in craft packs. Only four mini sticks need trimming, and the offcuts are used too.
What You Need
- About 10 standard craft sticks: 4 for the uprights and 6 for the shelves
- 4 mini craft sticks for the rungs and shelf cross pieces
- 2 jumbo craft sticks for the back brace
- White craft glue or tacky glue, with wood glue as an option for the frame joints
- Sturdy scissors, plus a cup of warm tap water for softening the mini sticks
- Sandpaper or an emery board
- Pencil, ruler and a square-cornered piece of card
- Wax paper, clothespins and a heavy book
Choose the straightest sticks in the pack for the four uprights, because a bowed upright makes the whole unit lean.
The Parts and How They Fit
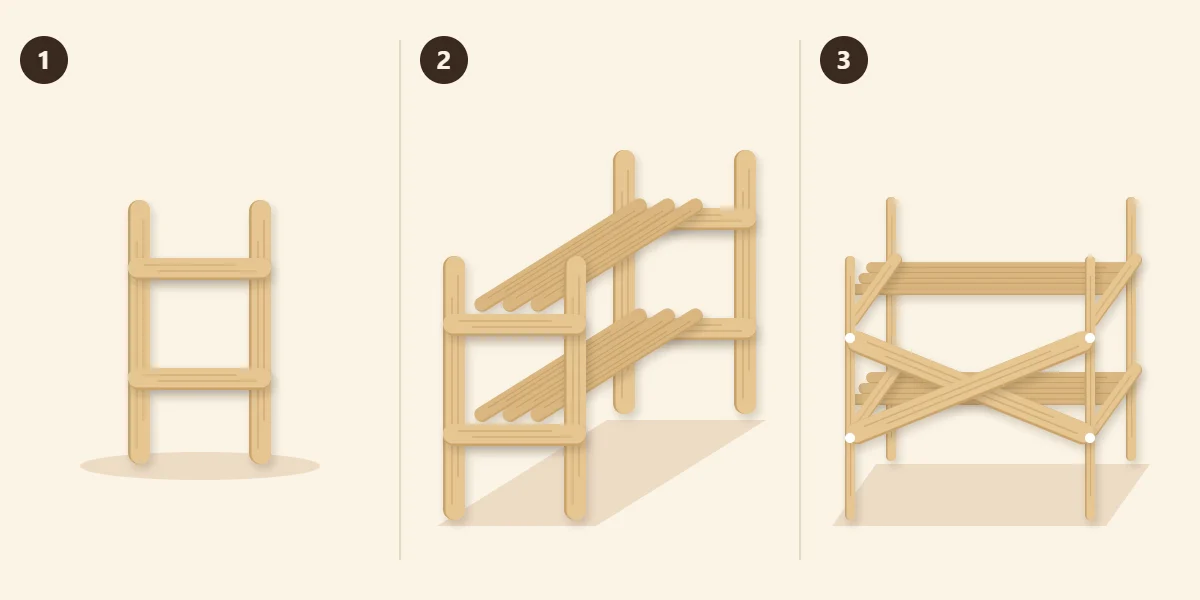
Each side frame is two upright standard sticks joined by two short rungs, like a short ladder. The rungs hold the uprights parallel, and their top edges form the ledges the shelves sit on. Each shelf is a panel of three standard sticks side by side, held together underneath by two short cross sticks.
Three standard sticks side by side are about 1 1/8 in (2.9 cm) wide, so a whole mini stick is too long for a rung. Trimming each one to about 1.5 in (3.8 cm) gives the right length and leaves an offcut of about 1 in (2.5 cm), which becomes a shelf cross piece.
| Part | Sticks | Notes |
|---|---|---|
| 2 side frames | 4 standard, 4 trimmed mini | Rungs about 1.5 in (3.8 cm) |
| 2 shelf panels | 6 standard, 4 mini offcuts | Cross pieces about 1 in (2.5 cm) |
| Back brace | 2 jumbo | Glued in an X |

Cut the Rungs and Build the Side Frames
- Trim the mini sticks. Soften the four mini sticks in warm tap water until they flex slightly, mark each one about 1.5 in (3.8 cm) from an end and cut with sturdy scissors. Wear eye protection, because offcuts can jump, and have an adult do the cutting when making this with children. Sand the cut ends square.
- Match the rungs. Stand the four long pieces side by side on the table and sand any that are taller than the rest.
- Mark the uprights. Lay the four upright sticks together with their ends level and draw two pencil lines across all of them at once, about 1 in (2.5 cm) and about 3.25 in (8.3 cm) from the bottom. These lines are where the top edge of each rung goes.
- Glue the first frame. On wax paper, set two uprights parallel so their outer edges are about 1.5 in (3.8 cm) apart. Glue a rung across them at each pencil line, the rung ends level with the outer edges of the uprights. Check the corners against the square card.
- Build the second frame on top of the first. Lay a strip of wax paper over the first frame, place the next two uprights directly over the ones below and glue on their rungs. Stacking is the simplest way to get two identical frames. Rest a book on the pair until the glue has set.
Each rung is a lap joint, one stick laid flat over another. The guide to joining and reinforcing craft stick structures explains why that holds so well.
Make the Shelf Panels
Lay three standard sticks side by side on wax paper with their ends level against the ruler. Glue two of the mini offcuts across them, each about 1/2 in (1.3 cm) in from an end. Keeping them back from the ends leaves the last stretch of each shelf free to sit on a rung. Make the second panel the same way and weight both flat until the glue has set.
Assemble the Shelf and Add the Back Brace
- Stand one side frame up with its rungs facing inward. A clothespin clipped to the foot of each upright works as a temporary stand.
- Set the shelves on the rungs. Stand the second frame opposite the first, rungs facing in. Run a thin line of glue along the top edge of all four rungs, then lower each shelf panel into place, cross pieces down, so its ends rest on the rungs and press against the uprights. Leave the unit alone until the glue has set.
- Glue the X brace on the back. Lay the shelf face down. Place one jumbo stick diagonally from low on one back upright to high on the other and glue it at both ends. Glue the second jumbo stick across it the opposite way, with a dot of glue where the two cross.
Jumbo sticks are used because the back uprights are farther apart than one standard stick is long.
Tip
Without the brace, the shelf is a rectangle held by small glue lines, and a rectangle can fold sideways into a slant. A diagonal stick turns it into triangles, which keep their shape. Two diagonals resist a push from either side.
Common Problems
- The shelf rocks on the table. One upright is longer than the others. Rub the feet on a sheet of sandpaper laid flat until all four touch.
- A shelf slopes. The rungs were glued at different heights. This is why the uprights are marked together in one pass.
- The unit sways from side to side. The brace is missing or glued at only one end. Each diagonal needs glue on both uprights.
Finishing and Variations
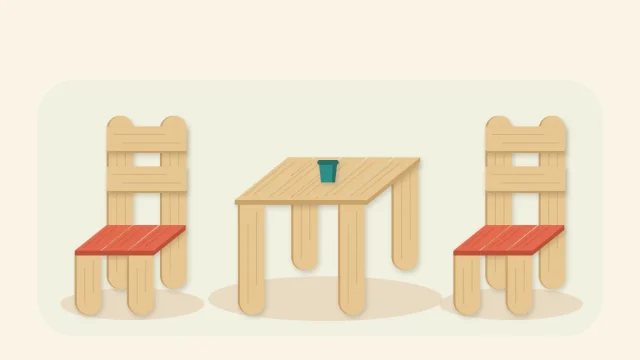
Leave the wood natural, or paint the parts before assembly so the brush can reach every face. Paint the shelf panels lightly on both sides so they stay flat. For a wall display instead of a desk unit, the honeycomb hexagon shelf is the next step up, and the same small scale suits a miniature chair and table set to stand beside it.
Watch out
This shelf is for small, light objects only. Do not use it for anything fragile, valuable or filled with liquid, and keep it and its tiny contents away from young children and pets.
Frequently asked questions
Why does a mini popsicle stick shelf need a brace on the back?
Without a brace, the shelf is a rectangle held together by small glue lines, and a rectangle can lean sideways into a slanted shape. Diagonal sticks divide it into triangles, which keep their shape unless a stick bends or a joint fails. Two sticks in an X resist a push from either side.
How do you make the two side frames match?
Mark all four uprights together in one pass so the rung lines are at the same height. Then build the first frame flat, cover it with wax paper and build the second frame directly on top, lining up each upright with the one below. Matching frames keep the shelves level.
What can a mini craft stick shelf hold?
It is meant for small, light objects such as a tiny empty pot, a few beads or a miniature bottle. It is a decorative desk piece, so avoid anything fragile, valuable or filled with liquid. Keep it and its small contents away from young children and pets.