Popsicle Stick Gift Basket: A Small Slatted Tray for Presents
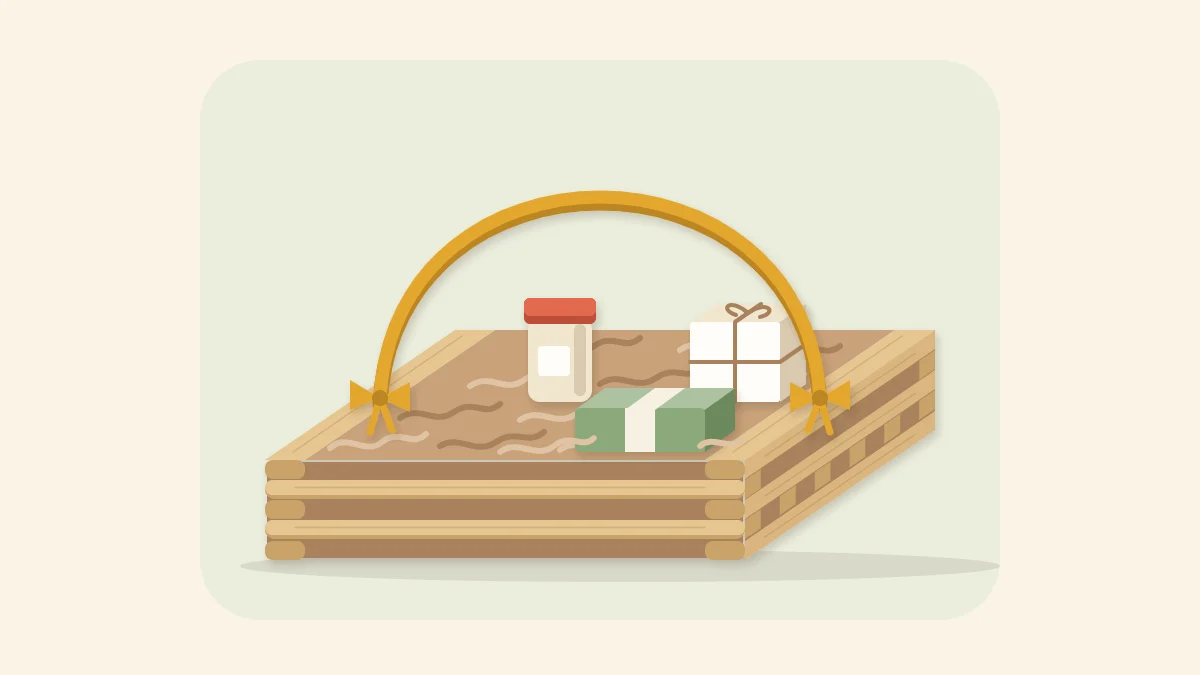
A low slatted tray built from whole craft sticks: six slats on two runners, log-cabin walls and a ribbon handle. Line it with paper shred and fill it with a few small, light items.
Tutorial at a glance
What you need
- About 14 standard craft sticks for the low tray
- White craft glue or tacky glue
- Wax paper or baking parchment
- A heavy book to use as a weight
- Ribbon or twine
- Acrylic craft paint and a small flat brush
- Fine sandpaper or an emery board
- Paper shred or a cloth napkin
Small presents look more considered when they arrive in something handmade. This popsicle stick gift basket is a low slatted tray, about as wide as one craft stick is long, with a ribbon handle tied across the top. It holds a few small, light items on a bed of paper shred.
No sticks are cut or bent. The base is a row of slats on two runners, the sides are stacked log-cabin style, and the handle is ribbon or twine. Craft sticks, the name popsicle sticks go by in craft packs, vary slightly in size, so treat every measurement here as a suggestion and check your own.
What You Need
- About 14 standard craft sticks, each about 4.5 in (11.4 cm) long, for the low version
- White craft glue or tacky glue
- Wax paper or baking parchment
- A heavy book to use as a weight
- Ribbon or twine, about 12 in (30 cm)
- Acrylic craft paint and a small flat brush
- Fine sandpaper or an emery board
- Paper shred or a cloth napkin for lining
Choose new, flat sticks. Stacked walls magnify any warp, because each layer rests on the one below.
Choosing a Basket Size
The footprint stays the same, about 4.5 in (11.4 cm) square. What changes is the number of wall layers. A layer is a pair of sticks on opposite sides, and it raises the wall by one stick thickness, roughly 1/12 in (2 mm). To plan a deeper basket, stack loose sticks to the height you want, count them, and multiply by two.
| Basket size | Sticks | Suits |
|---|---|---|
| Low tray, 3 layers | About 14 | Flat items on paper shred |
| Medium, 6 layers | About 20 | Small jars and soaps |
| Deep, 10 layers | About 28 | Taller small items |
Every size uses 8 sticks for the base (6 slats and 2 runners) plus 2 sticks per layer. The steps below build the low tray.
Build the Slatted Base, Walls and Handle
Paint two sticks first and set them aside to dry; they become the top layer. Painting them now is far easier than painting around a finished rim. The guide on painting craft sticks without warping them covers thin coats and drying flat.
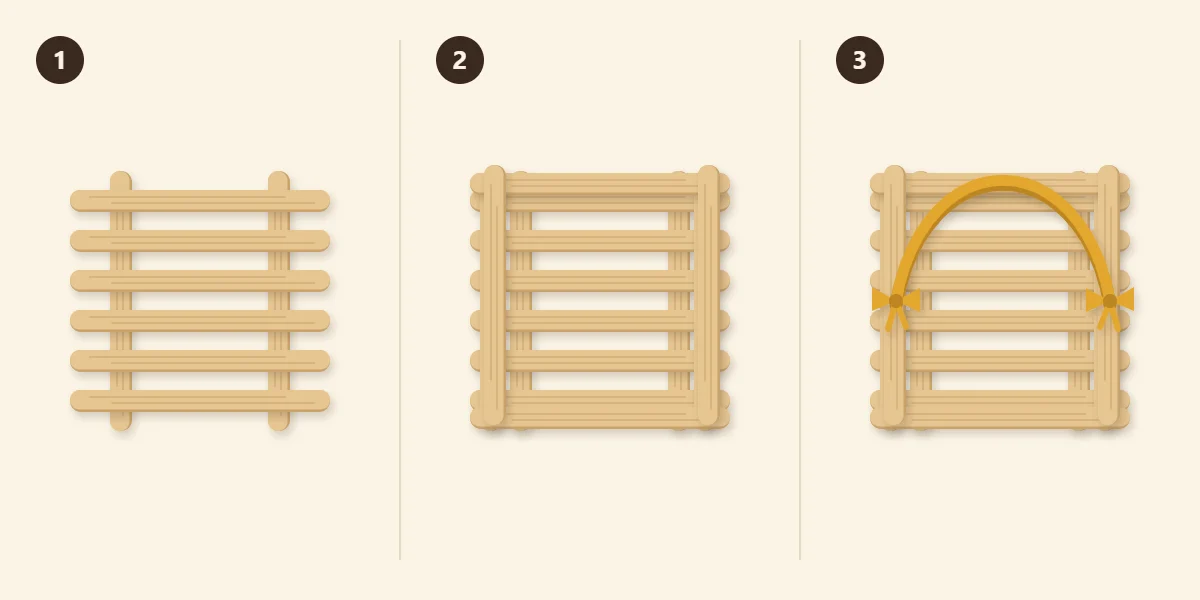
- Glue the slatted base. Lay two runner sticks parallel on wax paper, about 3.5 in (9 cm) apart. Glue six slats across them at right angles. Set the first and last slats level with the ends of the runners, then space the other four evenly between them. The gaps come out slightly wider than a stick, so a spare stick laid in each gap is a handy spacing check. Cover with wax paper and a heavy book until the glue has set, then turn the base over so the runners become feet.
- Stack three wall layers. Glue the first pair of sticks across the ends of the slats, one along each end, so every slat is tied in twice. Glue the next pair on top at right angles, lying over the two outer slats with their ends resting on the first pair. Finish with the painted pair, lying the same way as the first. This is log-cabin stacking: each pair sits across the ends of the pair below. Put only a small dot of glue at each corner and keep the corners lined up as you go.
- Tie on the handle. Once the walls have set, thread one end of the ribbon through the narrow gap under a top stick, at its middle, and knot it around that stick. Arch the ribbon over the basket and knot the other end around the opposite top stick.
The same three steps build the deeper sizes. Keep adding pairs in step 2, checking after every few layers that the walls rise straight and have not started to twist. For more detail on stacked walls and squaring corners, see the full popsicle stick box with a lid, which uses the same technique at a larger scale.
Watch out
The ribbon is decoration, not a carrying handle. Lift and carry the basket from underneath with a flat hand, and fill it only with small, light items.
Lining and Filling the Basket
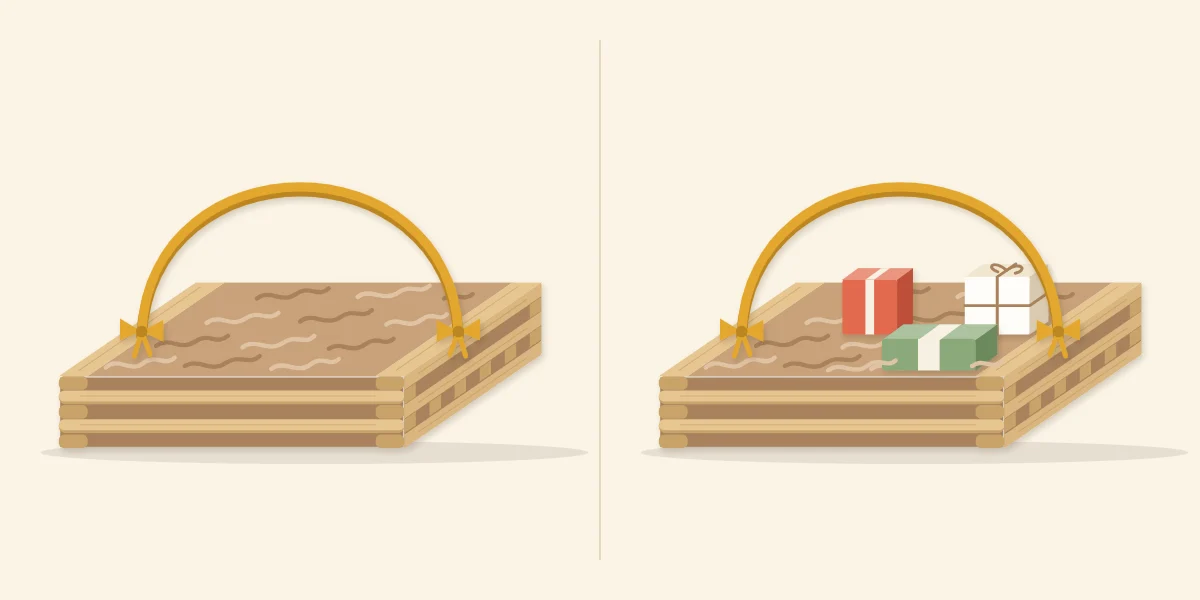
The gaps between the slats are part of the look, but small things can slip through them. Line the empty basket first. A loose handful of paper shred is enough for the low tray; it should rise just above the rim so the contents sit proud of the walls. A cloth napkin folded into a square works as well and becomes part of the present.
Then add the contents. Three small items fill this footprint without crowding: for example a wrapped bar of soap, a tiny jar and a small wrapped box. Put the tallest item toward the back and nestle each one into the lining so it cannot slide when the basket is moved. Leave the ribbon free above them.
Presentation Notes
Match the painted top layer and the ribbon to the wrapping paper so the basket and its contents read as one set. A paper tag can be tied to the ribbon knot on one side. If the basket has to travel, pack it in a box with the ribbon folded down, and hand it over held from below.
Tip
Planning a set for the table? A handmade craft stick napkin holder finished in the same color can be given alongside the basket.
Common Problems
- The walls lean or twist. Corners drifted as layers went on. Check from above after each pair and nudge the sticks back before the glue grabs.
- The base rocks. A runner is warped or glue dried under it. Sand the high spot, or rub the underside on sandpaper laid flat.
- Glue shows at the corners. Too much glue was used. Wipe squeeze-out while wet with a damp brush, since dried glue shows through paint and stain.
- A slat comes loose. It was held by the runners alone. Make sure the first wall pair crosses every slat end, and glue each crossing.
Finishing and Variations
Leave the lower layers natural and let the painted rim carry the color, or paint alternate layers for stripes, always painting the sticks before stacking. Sand the corners lightly where the stick ends meet so nothing catches on the lining. Twine instead of ribbon gives a plainer, rustic look. Keep the finished basket away from candles and heat, and keep ribbon and small contents away from young children and pets.
Frequently asked questions
How many popsicle sticks does a gift basket need?
The base always takes eight sticks: six slats and two runners. Each wall layer adds two more, so the low three-layer tray uses about 14 sticks and a ten-layer basket about 28. Stack loose sticks to the height you want to work out your own count.
Can you carry the basket by its ribbon handle?
No. The ribbon is tied around thin sticks held by small glue joints, so treat it as decoration. Lift and carry the basket from underneath, and keep the contents small and light.
What should you line a slatted basket with?
Paper shred or a folded cloth napkin both work. The lining covers the gaps between the slats so small items cannot slip through, and it lifts the contents so they show above the low walls.