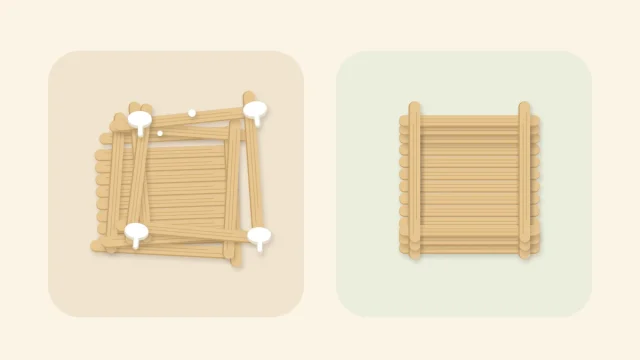
Best Glue for Popsicle Sticks: White Glue, Wood Glue and Tacky Glue Compared
White glue, tacky glue and wood glue compared for craft stick projects, plus how to apply a thin layer, clamp the joint and avoid warping.
Tutorial at a glance
What you need
- A few standard craft sticks for practice joints
- White craft glue or tacky glue
- Wood glue for structural joints
- Clothespins and rubber bands
- Wax paper or baking parchment
- A damp cloth
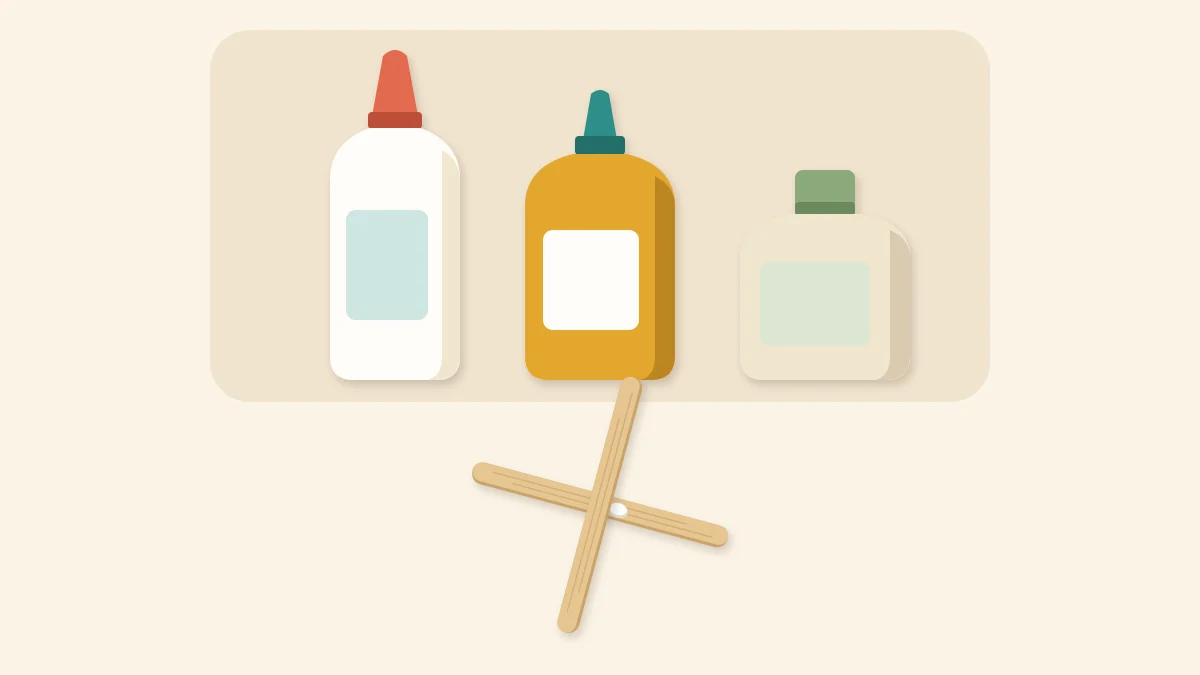
The best glue for popsicle sticks is, for most projects, ordinary white craft glue or tacky glue, with wood glue kept for joints that have to carry some strain. All three are water-based, clean up with a damp cloth and bond bare wood well. The differences between them are in how quickly they grab and how stiff the joint is once it has set.
How you use the glue matters at least as much as which bottle you pick. A thin layer under steady pressure makes a strong, tidy joint with any of the three.
The Four Glues Compared
Popsicle sticks, sold in packs as craft sticks, are thin, porous birch. Glue soaks slightly into the surface of both sticks and locks them together as it dries, which is why water-based wood and craft glues suit them so well.
White school glue
White glue is thin, easy to spread and forgiving. It grabs slowly, so you can nudge a stick back into line, but parts slide unless they are clamped or weighted. It is a good choice for flat panels, layered pieces and anything made with children.
Tacky craft glue
Tacky glue is a thicker version of white glue. It grips sooner, so a stick stays where you put it, which helps on upright pieces and stacked walls. Because it is thick, it is easy to put on too much. Spread it out with a spare stick rather than leaving a raised bead.
Wood glue
Wood glue is a PVA glue made for wood, usually pale yellow. It sets into a stiffer joint than white glue and is the one to use for structural joints: the corners of a frame that will stand up, the members of a model bridge, the legs of a stand. It can dry with a yellowish line, so wipe squeeze-out before it sets if the joint will be visible.
Glue sticks
A glue stick is made for paper. It leaves too little adhesive on wood to hold a joint, and pieces stuck with it tend to pop apart when handled. Keep it for sticking a paper photo or a card backing to a finished piece, not for joining stick to stick.
| Glue | Grab and best use | Watch out |
|---|---|---|
| White school glue | Slow grab; flat panels and layers | Parts slide unless clamped |
| Tacky craft glue | Medium grab; upright pieces, stacked walls | Easy to apply too thickly |
| Wood glue | Medium grab; structural joints | Can leave a yellowish line |
| Glue stick | Weak on wood; paper and card only | Joints pop apart |
What About Glue Guns?
Low-temperature glue guns exist and grab fast, which is why they appear in many craft videos. A glue gun is a hot tool, though: it is for adult use only, following the maker’s instructions. No project on this site requires one, and every project here is written for white, tacky or wood glue.
How to Apply Glue and Clamp a Joint
Work on wax paper or baking parchment so the piece does not stick to the table, and have a damp cloth within reach before you open the bottle.
- Apply a thin line. Run a thin line of glue along the end of the first stick, only where the next stick will sit. Spread it with a spare stick if it stands up in a bead.
- Press the next stick on. Lay it on top at a right angle to form an L corner and press down firmly. A tiny bead of squeeze-out along the edge is a sign there is enough glue. Wipe it away with the damp cloth.
- Hold the joint. Clip a clothespin over the corner and leave the glue to set as the label directs. Check once more that the corner is still square, because clamps can pull a joint sideways as they close.
A rubber band works around boxes. For flat panels, cover the piece with wax paper and set a heavy book on top.

Tip
Squeeze a small pool of glue onto a scrap of card and pick it up with the end of a spare stick. Dabbing glue on gives far more control than squeezing straight from the bottle.
How Much Glue to Use
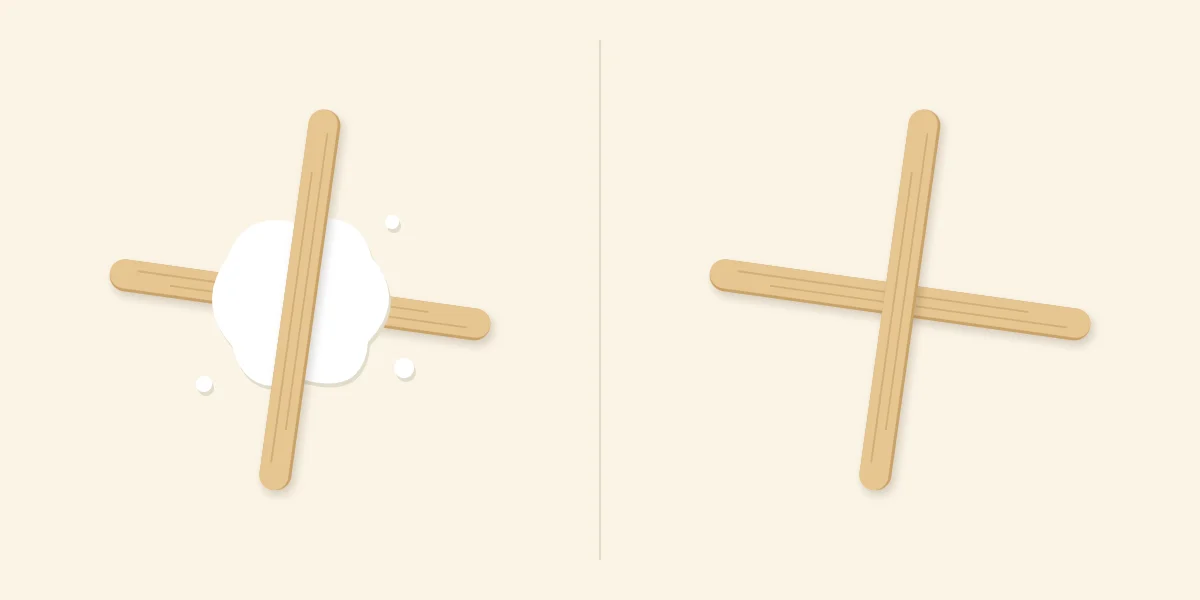
More glue does not mean more strength. A joint is strongest when the two wooden surfaces are pressed close together with only a film of glue between them. A thick layer keeps the surfaces apart, and what holds the joint is then a soft pad of glue instead of wood bonded to wood.
Too much glue causes three other problems:
- Warping. These glues are mostly water. Thin sticks soak it up on the glued face, swell on that side and curl. A panel flooded with glue can dry into a shallow curve.
- Sliding. Sticks float on a thick layer and drift out of line while you reach for the clamp.
- Marks. A large puddle of squeeze-out dries hard and shiny. Paint sits differently on it, and stain will not soak in there at all, leaving a pale patch.
Aim for a layer thin enough that you can still make out the grain through the wet glue. If glue runs out of the joint in a puddle when you press, wipe it and use less on the next one.
Matching the Glue to the Joint
Sticks that overlap share a wide glued area and hold well with any craft glue. Sticks that meet only at their ends have almost no area to bond, and no glue makes up for that. The guide to joining and reinforcing craft stick structures shows which overlaps to use where.
White or tacky glue suits flat pieces; wood glue suits joints that keep a piece upright.
When Glue Goes Wrong
Most glue trouble is easy to trace. A joint that pops apart usually had too little pressure, or was handled before it had set. A curved panel had too much glue or was not weighted. The list of common craft stick mistakes and their fixes covers how to rescue each of these.
Watch out
Do not thin glue with extra water to make it spread. The added water soaks into the sticks and makes warping worse.
Gluing Before or After Painting
Glue bonds best to bare wood, because paint and sealer form a skin over the grain. Where strength matters, glue first and paint the assembled piece, or leave the contact areas unpainted. The guide to painting craft sticks without warping them explains how to plan the order.
Frequently asked questions
Is wood glue or white glue better for popsicle sticks?
Both bond craft sticks well. White glue is easier to spread and reposition, which suits flat and decorative pieces. Wood glue sets into a stiffer joint, so it is the better choice for corners and structural joints on pieces that stand up.
Why do my popsicle sticks warp after gluing?
Craft glues are mostly water, and thin sticks swell on the side that soaks it up. Use a thinner layer of glue and press flat pieces under wax paper and a heavy book while they set. Never thin the glue with extra water.
Can I use a glue stick on popsicle sticks?
A glue stick is too weak for joining stick to stick, and joints made with it tend to pop apart when handled. It is fine for sticking paper or a photo onto a finished piece. Use white, tacky or wood glue for the structure.